Tora ! Tora! Tora! Pearl Harbour is attacked and America enters the war
I discovered i made a large mistake. US entry and tension values (which alows the US to take actions to help the Alies whilst Neutral then decalre war on the Axis) are supposed to be efectively double what I calculated them as. So the US has beeen far less active then it should have been and its war production has been far less). To compensate I allowed the 3 half built factories to be completed and active (equivalent to 12 build points in total and 2 Turns saved). I also alllowed the US to choose 3 Entry actions - they chose Pass War Appropriations Bill (increased production), Military Manouevres (so can call any type of Impulse not just no-cost Combined) and Occuppy Northern Ireland (so can base units there. get to use the factory and Belfast becomes a supply base for them). They also can declare war on Japan after this Turn or Germany/ Italy this Turn. (I want to see a Japanese sneak attack on the US but it will have to happen this Turn and ideally they wanted to do it the Turn after next.
The US chooses a Naval action. It moves 3 subs into Pearl Harbour, one old sub only manages to make it halfway. The two carriers in Pearl Harbour go out to sea. Escorts protect US convoys in the Canadian and Norwegian seas. The P38 flies from Greenland to Belfast which makes Hitler nervous. The only sub in the East Coast fleet also moves to Belfast. The Chinese Communists launch an attack southwest of Sian but only succeed in becoming disorganised with no casualties on either side. The Commonwealth spent Offensive Points to do a combined Land and Naval Impulse, moved troops in the middle of Libya back towards Egypt whilst attacking Tripoli with Wavell and armoured corps with medium bomber and some battleships in support (the rest of the Alexandria battleships stayed in the 3 box in the East Med). The Italian defenders were destroyed despite their defences. The Queens fast transports dropped S African territorials into Chittagong on their way to Port Sudan. Indian territorials moved into the mountains in Burma outside Rangoon to block further Japanese advance into India but becomes disorganised in doing so and the Mountbatten HQ moves to Dacca to protect both Calcutta and Chittagong. Escorts from the Commonwealth and Free French move out to protect their convoys and tankers. A transport plane is brought out of reserve into the same hex as the paratrooper corps.
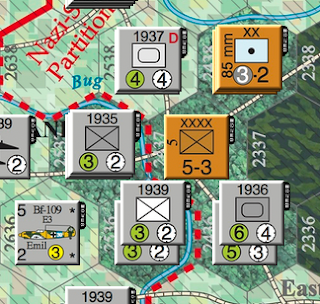
The Soviets focus on Poland. Threatened by a panzer breakthrough in North Poland the Soviets surround the panzers and also launch a pincer attack with the Zhukov HQ on the Guderian HQ to cut the supply route to the panzers. In South Poland Soviet forces surround the Von Bock HQ. Hitler notices the importance of thiese battles and both sides throw in every air unit available.

In the massive air battles one German fighter and medium bomber are shot down along with two Soviet fighters. The German 88 AA division send both Soviet bombers back. The Soviets use all their Offensive Points so Zhukov can double 5 units attack values including himself in the battle versus the Guderian HQ and in the attack on the panzer spearhead. The battle against the Pamzer spearhead results in the loss of a Soviet infantry army and the rest of the Soviets being disorganised. In the battle of Guderian vs Zhukov the Soviet Marshall gets revenge for his previous defeat by breaking through Guderian and the AA division (so they will return next Turn) for the loss of a Soviet Infantry army. The German breakthrough is now surrounded and out of supply! There is also a big gap in the Wehrmacht's lines! Two bombers rebase from the Ukraine into Poland. In South Poland the attack leads to the loss of both Soviet ski divisions but the German HQ is destroyed. All the Soviets are disorganised. Stalin is impressed and creates an infantry and motorised Guards Banner army in Poland. The Chinese Communists attack Japanese forces west of Sitan and destroy a militia corps and send the Japanese back to Sitan.

Hitler chooses a no-cost combined impulse. He decides not to declare war against the US as he has enough headaches.Worrying about Allied shenanigans such as invading France or Denmark he sends a couple of u-boats into the North Sea, 3 u-boats into the Faroes Gap and the milchow u-boat and u-boat basing with it into the highest 4 box in the US East coast. The u-boats fail to find any Allied vessels. German Ju88s and stukas push through Soviet air defences with the help of German and Rumanian fighters to ground strike the defenders of Zaporohze. Unfortunately their attacks achieve little. Hitler moves armoured forces and infantry in position to attack the Soviet forces forming a ring around the German spearhead in North Poland. The Wehrmacht with Manstein HQ providing support launch an attack on Zaporohze - the Soviets fly in Pe2s and the Germans and their axis allies send all their remaining fighters and bombers into the cauldron and Koniev HQ flips over to support the Soviet defenders. A jubilant Hitler takes the town destroying the Stalino militia and sending the remaining Soviet units onto the Production circle to return next Turn. A Hungarian corps and Manstein (who was going to flip over anyway) become disorganised. Hitler has his bridgehead over the Dnepr and can now look to roll up the Soviet river defensive line from the South. The weaker fighters now cover the Ruhr and better fighters move to Konigsberg to counter the Soviet bombers in Poland. A new German naval aircraft intended for the Med instead moves from Munich to the Belgian coast. Rommel HQ rail moves to near Konigsberg and most of the remaining Offensive Points to reorganise him. Hitler will use this HQ next impulse in an attempt to break the Soviet encirclement.
For the next Impulse weather is Fine except in North Monsoon. The isolated Chinese Nationalists in Kumming launch an attack on a Japanese corps in the mountain and roll well but because of the low odds in rain lose an army, a garrison division and an artillery division but at least destroy a Japanese corps. Kunning with a factory that can be used by the Japanese is potentially gettable with a low odds attack. The US chooses a naval impulse and their Transports -accompanied by two old battleships - move through the Panama canal to the East Coast and pick up the strong motorised corps and the Eisenhower HQ.
Soviets choose a no-cost combined impulse. They move ships into the 3 box of the Baltic Sea. They try to ground strike the Rommel HQ but are turned back by Luftwaffe fighters. A weak militia army is rail moved to Kharkov. A militia army moves from Rostov to Stalino to join the HQ there. A rifle army moves southwards to the edge of the Pripyat marshes.
Fine weather all over this impulse. The Commonwealth chooses a no-cost combined impulse. Two transports pick up the two armoured corps in Tripoli. The Italian naval aircraft tries to intercept but only ends up being intercepted itself by the Beaufighter and gets shot down. The two transports move into the Bay of Biscay. The Marine and Canadian motorised corps succeed in an amphibious landing in St Nazaire. 3 Offensive Points are used to pay for an additional land attack. The Paratrooper corps launch a risky drop on Nantes but with heavy bomber support they succeed in their daring raid. The Allies have landed in France! More of a poundshop D-Day without overwhelming force but a nasty headache for Hitler. Stalin who has been bugging Churchill for a Second Front is pleased.
Italy chooses a no-cost combined impulse and moves two fighters and a medium bomber to join the fighter already in France. They are responding to Hitler's please to help guard France. An infantry corps is moved from Naples to Paris. Rommel along with panzer and panzergrenadier and SS infantry corps attacks the mechanised soviet army to break the encirclement and succeeds in forcing it to retreat to open a path but at the cost of losing the panzergrenadiers. In South Ukraine two panzer corps and the Vlassov cavalry corps attack Mariupol but in a clumsy attack only succeed in disorganising themselves. Still Hitler is pleased.
Japan combines naval with land impulse for 10 Offensive Points. The Japanese declare war on the US and gain surprise. The aircraft carriers with most of their aircraft port strike Pearl Harbour and get 11 surprise points - in the ensuing carnage modern battleship Maryland gets sunk and Colorado gets damaged and the older battleship Maryland is sunk and Oklohoma is damaged. What a day of infamy! Using light cruisers and divisions including marine divisions the Japanese invade and take Midway, Guam, Wake Island, Pagua and Howard Islands. A Japanese infantry corps invades and takes a minor Philippines port Legaspi and transports a garrison corps (which will retain a defence value of 3 even if out of supply as it's white print) to Rabaul. An infantry corps is transported to Rangoon from Vietnam whilst the infantry in Rangoon move north towards Mandalay. Yamomoto and two Marines corps attack and destroy the Netherlands East Indies corps in Batavia and conquer the Netherlands East Indies. Yamashita HQ and infantry corps and AA division take the resource hex north of Singapore which will surely be attacked next Turn. Once that falls many Japanese corps will surely descend on India. In China Kumming is attacked by two infantry corps and falls with the loss of one infantry corps and the defending infantry corps being eliminated. Japan gains the use of a red factory. Japan gambling hard uses all but 5 of its remaining Offensive Points and attacks Langchow with its armoured and infantry corps. The odds are still only 2:1 but despite losing one infantry corps and the remaining armoured corps takes Langchow with its unusable factory and destroys the warlord and garrison corps defending it. China has only 4 factories left. The armoured corps is now isolated though. Brutal losses in both sides in China. More importantly the US is now in the war. The rest of the Turn will be described in the next blog.

Comments
Post a Comment